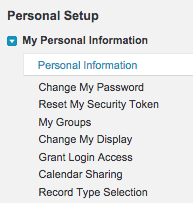
After installing Social Translate in your organisation, by default records and posts will be translated into the users language that is selected in the Personal Information.

1. Install Salesforce Record Translation Package.
Production - https://login.salesforce.com/packaging/installPackage.apexp?p0=04t58000000Md0n
Sandbox - https://test.salesforce.com/packaging/installPackage.apexp?p0=04t58000000Md0n
2. Go to Setup.

3. On the Salesforce setup page, please search for the “button” and click on the “Buttons, Links and Actions” link below the object name you want to create the button for.

If you are looking to add a button for a custom object, please copy the button script from the Lead, Contact or Account object. Search for “Objects” in a quick search and go to the Custom object of your choice.

4. Please click on “New Button or Link”.

5. Please name your button as 'Translate', select “Detail Page Button” as the Display Type, select “Execute JavaScript” in the Behaviour pick list and select “OnClick JavaScript” in the Content Source.
After you have finished selecting the setup options, please paste the JavaScript code in the designated area and press “Save”.

After you have saved the button, a new button should appear on the list.

6. Now please go to the object you have just created your button for and please click on “Edit Layout”.

7. Please click on the “Buttons” option and drag and drop the 'Translate' button on the Page Layout.

Please preview the Page layout to make sure records/fields in other languages are translated into your native language after clicking the 'Translate 'button.
